Sunday, December 21, 2014

WIP: Misato and Mini Moto Part 3!

Got busy so this project got put on hiatus for a bit but I was able to finish it up just recently.

Here are some more process pictures:

Primed Misato using Mr. Resin Primer.


A few pinholes on her back so I dabbed a bit of primer, sanded, then reprimed.


Didn't get an pictures of just the base colors, but I airbrushed them will vallejo model color.
For her jeans I hand painted the white on the fringes and dry-brushed white over the rest to pull out the texture.  Buttons painted with Vallejo liquid silver then put a light black wash over them to dull them down.


Hours of masking for 15 minutes of airbrushing!  The green stuff is liquid mask to fill in the smaller gaps.


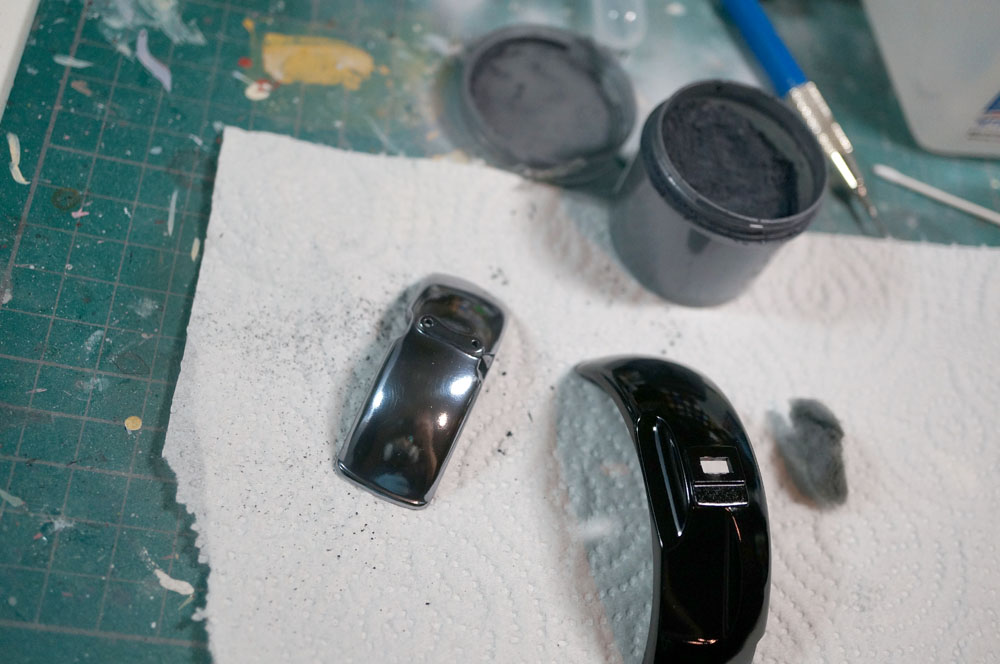
More masking for the blacks...  Cleaned up the stripes by hand later.


Cleaned up her kicks by hand and did a light wash over them.


It's Misato!  Hand painted her eyes and mouth.


There were some gaps where her hair met her face so after gluing it on, I had to fill some of the seams and repaint them.


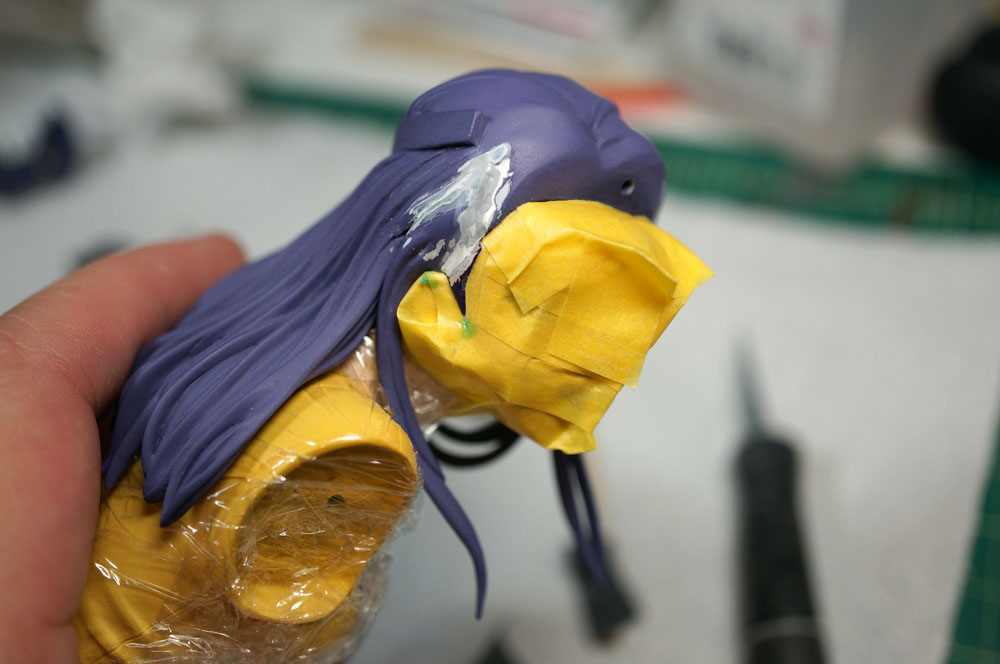
Goggles! and masking the strap on her head...


Setting u for the base.  I used a black picture frame and a sheet of foggy white acrylic.


After some thought I decided it would be cool to do some lighting in the base.  Got this flexible LED setup from Ikea and stuck it to the inside of the picture frame.  It also changes colors!


And a few shots of the finish. Will take some better pictures later...


Monday, July 14, 2014

WIP: Misato and Mini Moto Part 2!

Finished up the motorcycle. Decals weren't included so I had to make some custom ones (A bit of trivia: After some research I found out that this particular logo was originally found on 1977 Z50 Monkeys... I kind of want a monkey bike now...).  To hide the "decal look" I sprayed several layers of clear coat over them and then sanded the edges away with some 1500 grit sandpaper;  This was followed by one last clear coat.


Did some additional work on Misato's hair and then pinned her.


The recast kit I got didn't include the clear lenses for her goggles so I decided to try and vacuum form them.  I went to the $1 store and bought a food grater and a tupperware container.  Cut a  hole in the lid of the container and hot glued the grater to it with some additional plasticard to make sure it was airtight.  Another hole was cut on the side where the vacuum hose goes in (just a regular old cleaning vacuum).


For the clear plastic I cut it from some Ikea plastic packaging, sandwiched it between two pieces of cardboard, and taped the edges to keep the air in. The positive models were made with some miliput I had smooshed into the goggles and then sanded down.   I then heated it over the stove and quickly placed it over the grater and the molds with the vacuum on.  (Success!)


After some minor sanding the clear lenses fit!  Not bad for a $2 vacuum former! Will dip them in some future floor wax later to make them shine.


To be continued....

Monday, July 7, 2014

WIP: Misato and Mini Moto!

Currently working on a kit based on an illustration by Yoshiyuki Sadamoto:


It is actually two kits, the 1/6 Tamiya Honda Monkey and the resin Misato figure.  I had been looking for the original resin kit but the option came up and just decided to get a recast.  The original is long out of print...


I started off cleaning up the resin parts for Misato.  First a soak in some purple power degreaser and then the sanding and seam cleaning.  The kit was pretty good so there weren't any major issues, although I did accidentally lose a piece of her hair and ended up having to re-sculpt it....


I decided to hold off on pinning her and build the bike first just in case her pose didn't line up right.  The Kit came with a bunch of chromed pieces and I decided to first soak them in some simple green to remove the chrome coating.  The problem with the chrome coating is that all the burrs from clipping the pieces off the sprues show through and many of the parts are two pieces so it would be impossible to remove the seams without messing up the chrome.

Wish I had taken a  before and after shot but here are the de-chromed pieces.


The resin kit also included some custom monkey parts so those get purple powered too!


Did a quick test fit to see how the additional resin pieces would fit and then everything was primed with Mr. Surfacer 1200.


The big question I had was how to replace the chrome that I had washed off (the original coating on the parts was actually quite good. I wonder how Tamiya does it....).  I did some tests with various chrome paints including Alclad 2's chrome, and Spaz Stix Mirror Chrome But they only kind of simulate the look of chrome.  I finally settled on Kosutte Ginsan which is a really fine graphite powder that, when rubbed onto a gloss black surface, actually does a good job of simulating chrome.


The stuff really is magic!  If you polish it enough there is also no need for an overcoat.  Even taping it will not affect the finish.


Some more before and after for the exhaust:


For some bluing on the exhaust pipe I used clear blue, clear pink, and a clear yellow paint with one layered over the other.  Was also able to just spray it right over the Kosutte Ginsan.


For all the metallics aside from the chrome I used Alclad 2 paints.


Did a very subtle wash over the engine.  


(Time Jump!)  Everything is pretty much done.  All that is left is to print some decals for the fuel tank and side panel and color the rear and turning lights.


To be continued...